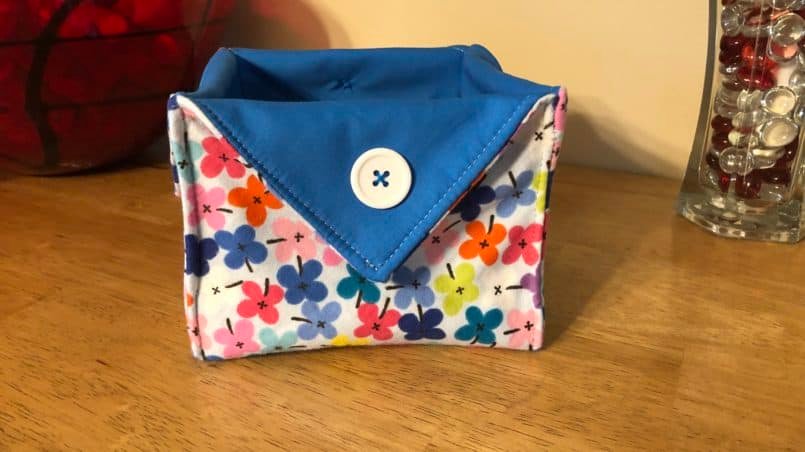
I was so charmed seeing these little fabric baskets on Pinterest and wanted a quick project to do in a free hour on the weekend. This was perfect and didn’t even take me the full hour. The instructions for how to make a fabric basket are below:
Materials:
- Two coordinating fabrics (need 16″ square of each) – stiffer fabrics like flannel or canvas work best, but really any type of fabric will do. In this project I chose a patterned flannel for the outside of the box, solid blue blend for the inside and a forest green felt for the lining.
- Felt/Fleece – I like stiffer felt better – gave it more structure
- Coordinating thread
How to Make a Fabric Basket Tutorial
Cut 16 inch squares of each fabric and felt/fleece and lay them on top of each other – right sides of fabric facing each other and then on top of felt/fleece

Sew all layers together with about a 1/4″ seam allowance. Mark about a 4″ opening in one of the sides in the middle and start sewing at the end of this opening. Sew all the way around on each side ending at the other end of the opening.

Turn right-side out so you have the right sides of the each fabric facing outward and the lining inside. At this point is should look like a pillow cover.

Press the sides of each of the square and then fix the opening so the raw ends folds inward and is in line with the rest of the side and then press it.

Top stitch a 1/8″ – 1/4″ all the way around the square so you opening is now closed with the top stitching.

Once your top stitching is complete and the opening is now closed, fold in half (inside fabric facing out) and clip or pin. Then on the corner that is folded, measure 3″ up the side and down the bottom and mark. Then draw a line on the corner to meet the 3″ marks. Sew on those lines so you are sewing on the corners.

Once the first two corners are done, fold the square so the top corners meet and clip/pin. This will expose the other two bottom corners. Mark the 3″ points and connect the dots to outline the next sew marks.

Sew on those lines and then you have a square base with the corners sewed shut like the photo below:

Clip off the corners close to the sewing line.

Turn right side out so your outside fabric is facing out and then enclose the inside seams by sewing a 1/4″ top stitch on the outside sides of the box.

You can finish the box by folding the top corner flaps down and tacking them down or using a decorative button.

I plan to try some variations on this – quilting the fabric before the corner part is constructed (should give it even more stability), stitching down the top flaps (maybe even rolling the corners of the flaps under to give it more of a straighter look), and others. I hope you have enjoyed how to make a fabric basket tutorial.


